Trampoline sprinkler is one of the most excited playing tool for kids. As parents, we always want to see our kids smile and laugh everyday. That’s also part of the best memories for every parent and the children themselves. Well, if you’ve already bought the idea to get a trampoline water sprinkler for your kids to bounce and jump in the summer like they play in the rain, then that’s perfect. I’m here just to share with you how to how to properly install and attach the water sprinkler to the trampoline in case you haven’t known it yet. Here we go!
Contents
3 Steps to Attached The Water Sprinkler to Your Trampoline
Here are the three steps to setup your water sprinkler and attach it to the trampoline enclosure. If you don’t like the reading, you can watch the Video Instruction by Trampoline Waterpark. I’d like to give a credit to this guy for such a helpful instruction video. His trampoline sprinkler is among the best product you may wanna look at. Let’s get start to instruction.
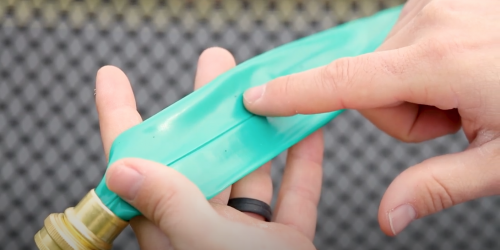
Step 1: Role the Sprinkler Hose Around
Assuming you have already setup your trampoline and other accessories. Here is how to attach the sprinkler to it. First, take out the sprinkler hose and wrap it around the your trampoline enclosure. When you wrap it around, please notice there are many tiny holes of which the water will come out and spray. So, make sure to turn those small holes inside the trampoline when you attach it to the net so that it will spay water to your kids while they are playing.
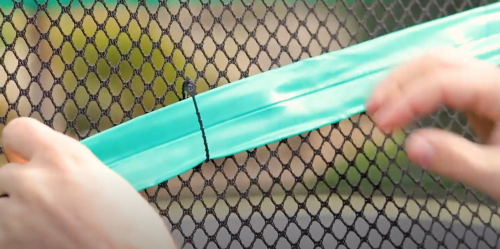
Step 2: Attaching the Hose to The Trampoline’s Net
Now, let’s put pressure regulator to the hose. Use the adjustable attachment strings to tie the sprinkler to the net. You can adjust the string tight or a bit loser; the tighter you set, the stronger the water pressure is, and vice versa. You actually can place the sprinkler at the bottom or on the top of the next. It’s up to you. But it’s better the place it outside the net so that your kids won’t accidentally kick it off while they are jumping.
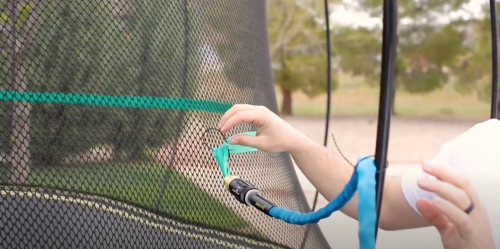
Step 3: Hook up with The Main Water Supply
When the water flow in, it will be heavy for the trampoline enclosure net to hold. Thus, we recommend you to have a pole to hook the main water supply up. Doing that will lessen the weight for your trampoline’s net. Once it’s done, turn the water to test it. You can adjust the attachment strings to the level of the water pray you like. Once you are satisfied with it, you can let your kids inside and start their fun time.
Conclusion
We know that installing the trampoline water sprinkler is just an easy task. But it requires to do it properly so that you can use it for a long time. Also, properly installing will let your kids to enjoy their activities to the maximum as well. We hope this guide will be of help for you. Cheers!